Through this feature it is possible to create an automation that automatically sends a message to the customer on a specific date (birthday) indicated in the dynamic field created ad hoc in the contact’s master data.
Let’s look specifically at how to create automation based on “Condition on Date and Time.”
Step 1 #
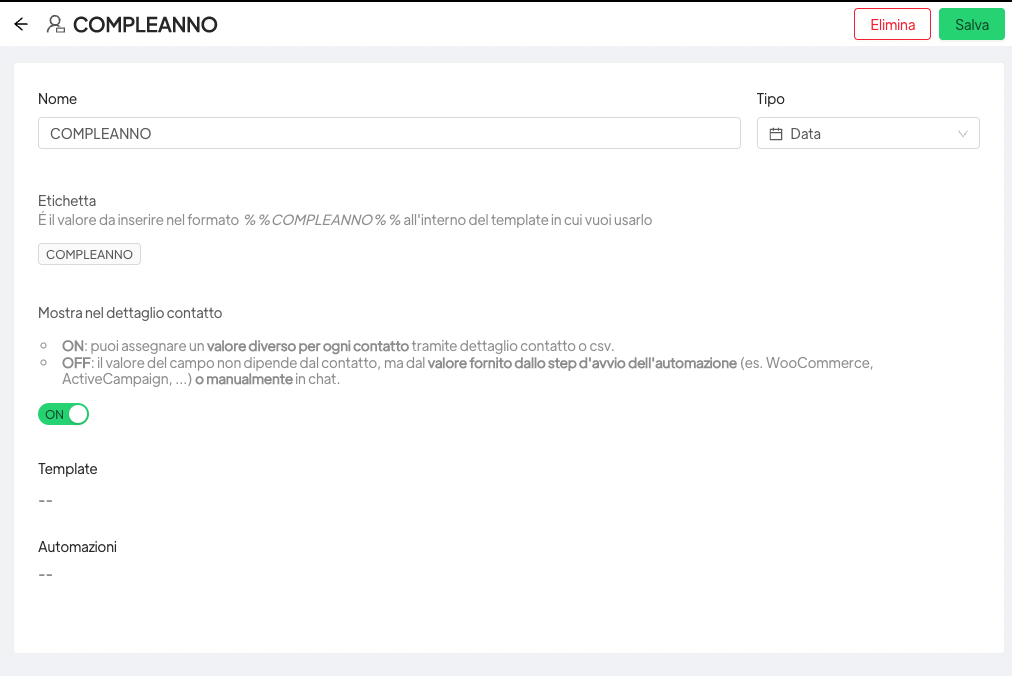
Create the dynamic field: in the “Dynamic Fields” section, create a new dynamic field by clicking on the top “New” button; enter the name and type of the field, selecting the last item “Date” in the drop-down menu.
Select “ON” to show the field in the “Contact Detail” section.
Step 2 #
Create the list of customers on a CSV file to whom you want to send the Greetings message.
In the excel file: name the column in which the dates on which the greeting message should start will be given, exactly with the name of the dynamic field, in our case “BIRTHDAY”.
Birthday dates with the current year will need to be entered in this column. Example: a client was born on May 25, 1989, in the birthday column I will enter May 25, 2023. Because Spoki needs to be told the date on which to start the message. This operation will only need to be done the first time, once Spoki has taken that contact’s birthday date it will repeat the submission every year. So it will NOT be necessary next year to go and change the date to May 25, 2024.
In the excel file the correct format to enter the date is yyyyy-mm-dd so in our example 2023-05-25.
Once the file has been completed, you must run it through IMPORT CSV FROM LISTS before uploading to Spoki. The file downloaded from LISTS and create CSV you will be able to upload it to Spoki contacts.
Step 3 #
Create the automation: in the “Automations” section, click on “New” in the upper right corner.
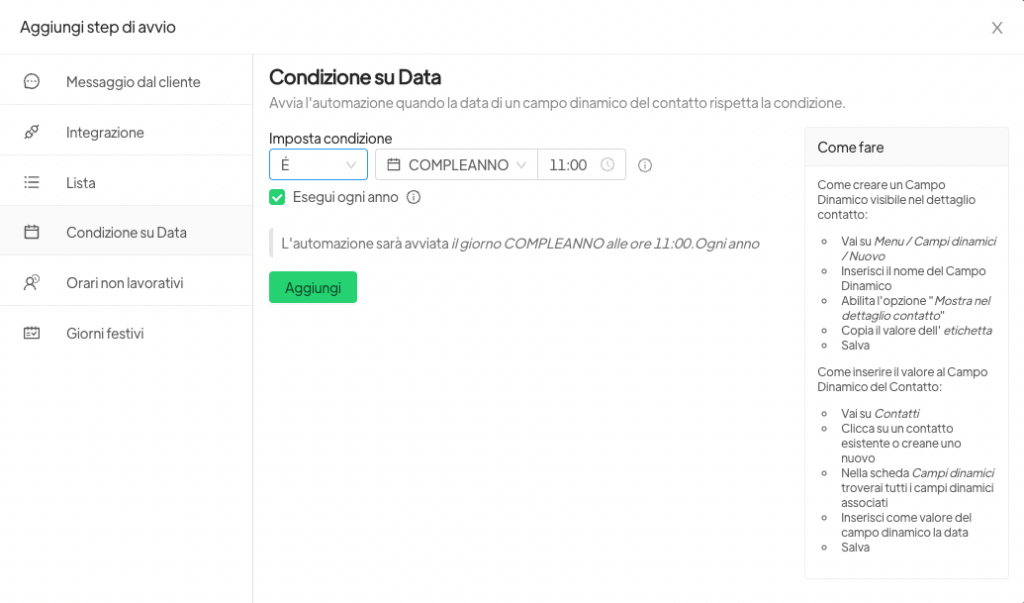
Select from “Add Startup Step” the “Condition on Date and Time” mode.
Once the trigger is selected, set the condition on the dynamic field (é, before…, after…) and the reference dynamic field.
In the example we will set the dynamic field referring to the birthday, next, we will set the condition, that is, what time we expect to send the message to the recipient.
NB: Click on the “Run every year” box so that the message will also start in future years without the need to change the date.
After setting the above conditions, select the pre-approved template from WhatsApp.
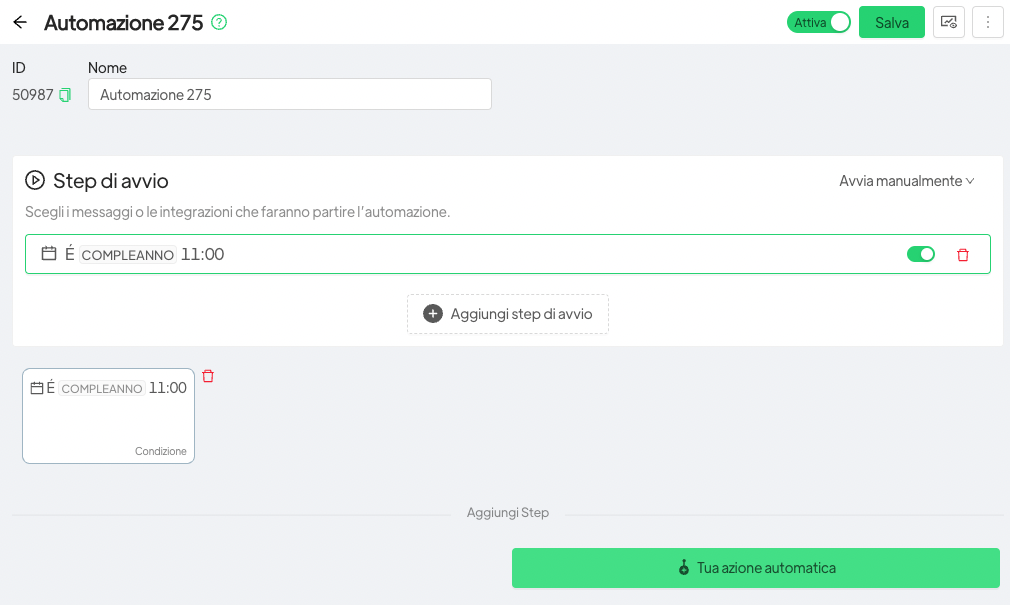
In this way, all users for whom you have entered the date in the dynamic field “BIRTHDAY” will receive a greeting message on the day you indicate.
Related articles #
Integrate WhatsApp with Calendly


