The Campaigns section allows you to schedule at a specific date and time to send a bulk message to lists of contacts.
The elements that you need to have previously created before setting up the campaign are as follows:
- Name: define the name of the campaign
- List: it is possible to indicate multiple lists of contacts to whom the same message should be sent. Be careful to make sure that the sum of contacts does not exceed the daily limit of contacts you can contact from your account (the information can be found in the dashboard in the “WhatsApp Status”). Warning. If there are a number of the same contacts within the lists, the message will be sent only once.
- Automation: indicate the automation to be started, which contains the message you want to send to your contacts on the lists indicated (see how to create an automation)
- Scheduled start date: date and time when you want to send the message contained in the automation.
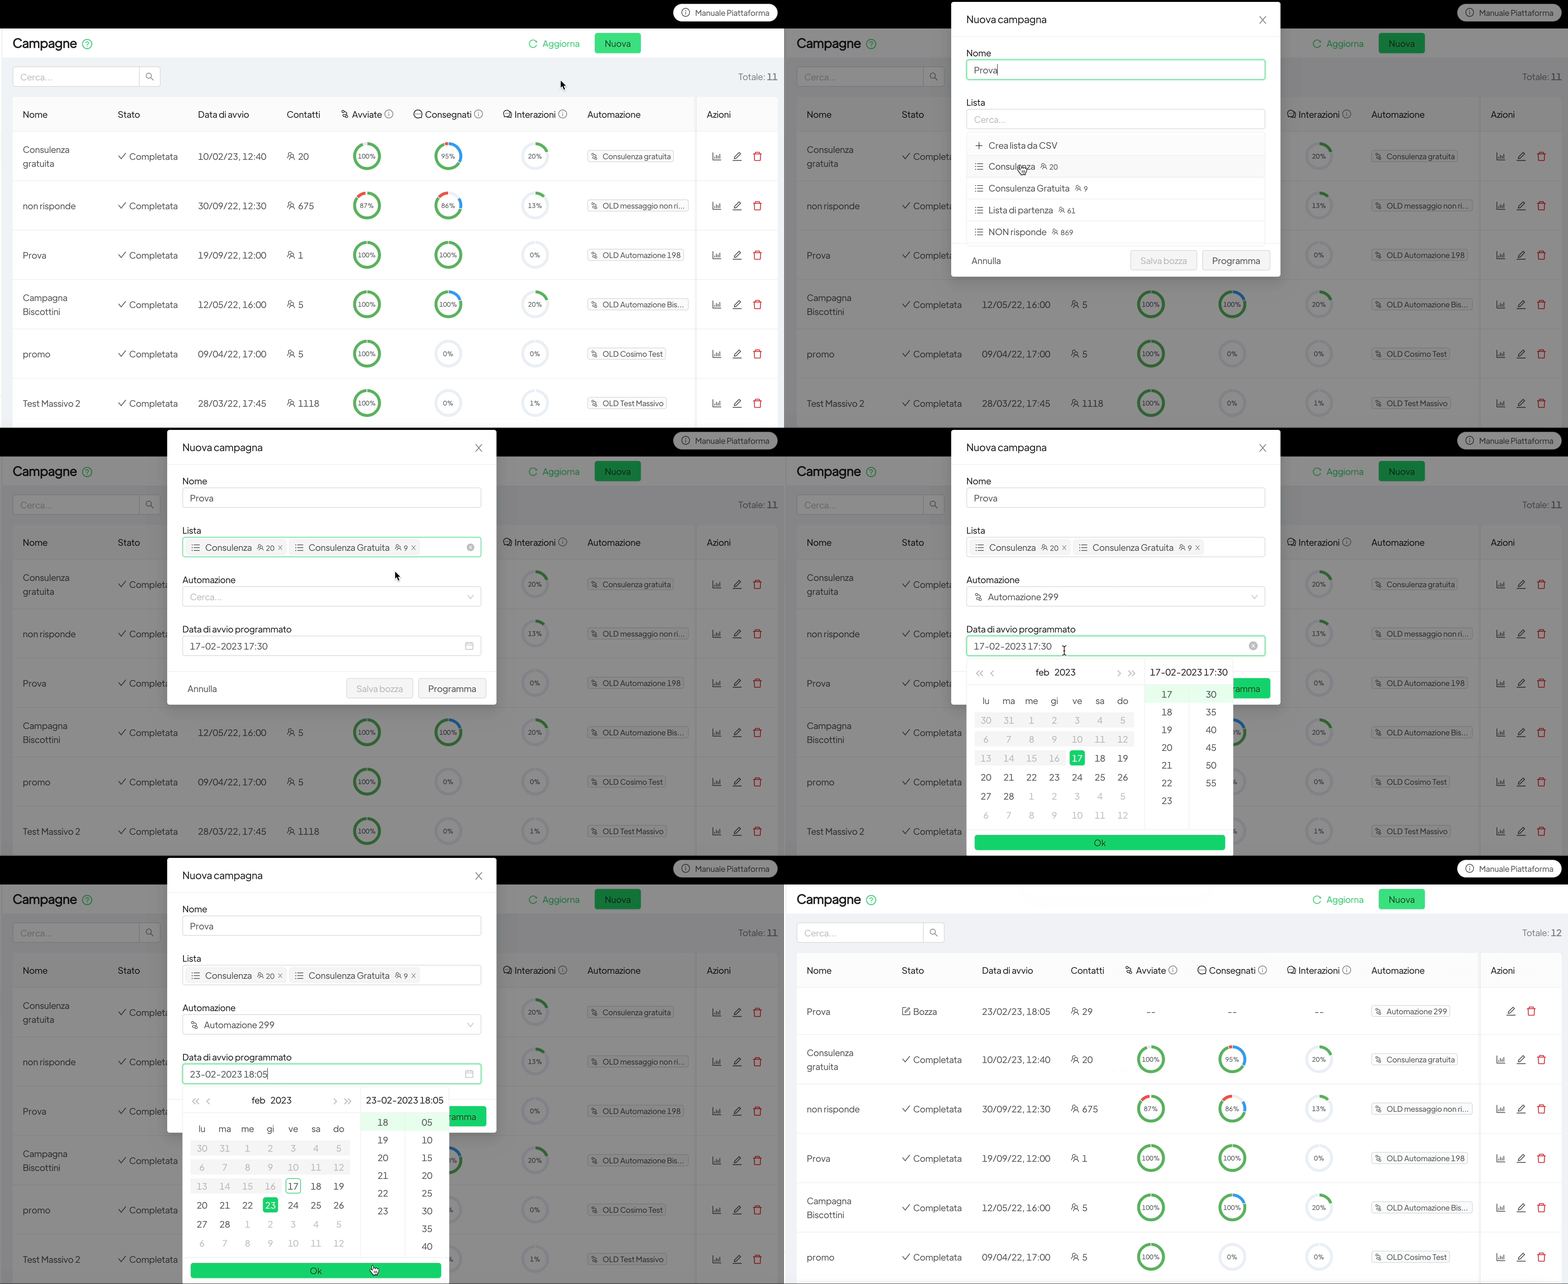
You can save the campaign as a draft or schedule it, once scheduled it can be edited or Deleted as long as the Campaign Status is “Scheduled” (and not “in progress”), using the buttons on the right.
It’s possible to add contacts not present in a list to a campaign, you need to go to the Campaigns section, create a new campaign, and then click on the box under Additional Contacts.
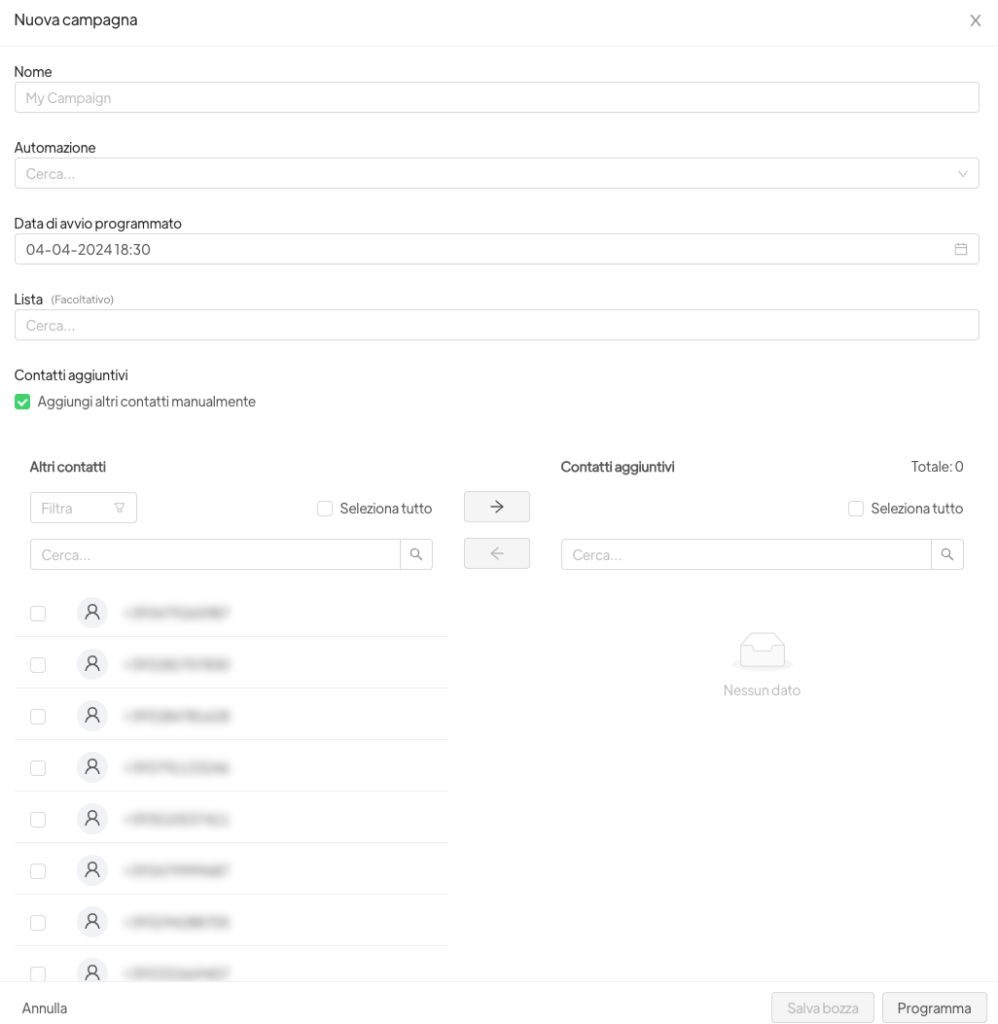
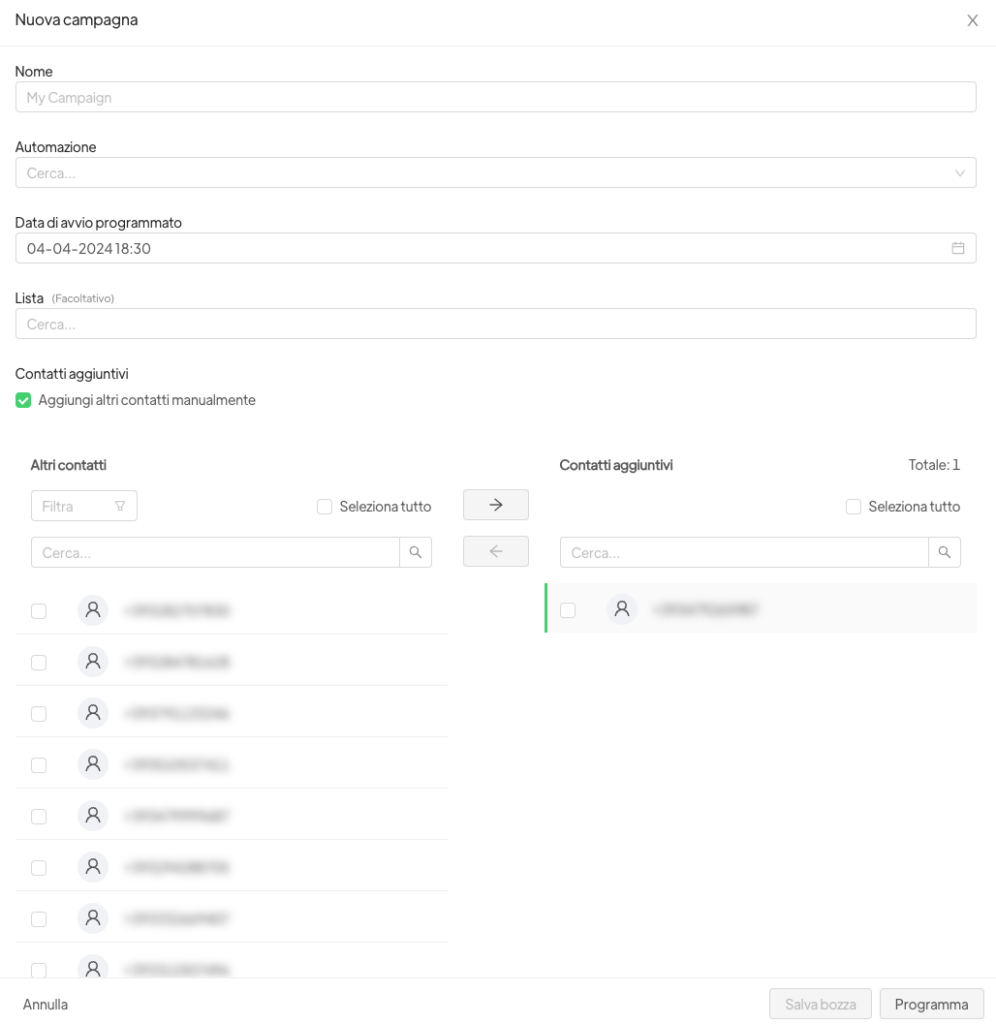
Once you click on Add contacts manually, you’ll be able to add all contacts that are not present in the lists by clicking on the corresponding checkbox next to the contact and moving them to the left column (Additional Contacts).
Below is an example of how a scheduled and a completed campaign is displayed.

Once the campaign has been sent, and thus completed, you can view the sending statistics by clicking on the graph icon on the right.
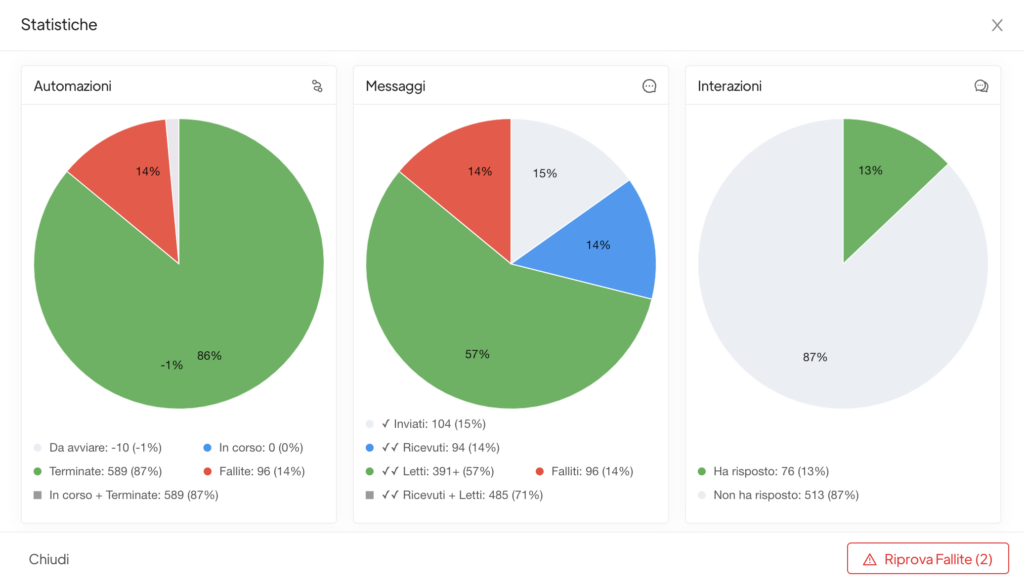
In the statistics you can view:
For automations: number and percentage of automations still “To be started” are indicated; “In progress” automations these automations are those for which more steps are set, so for this number of contacts there are still steps that could be completed; “Finished” are the automations completed in all the steps set; “Failed” are the automations for which the message contained in the automation could not be sent because, for example, the contact number is invalid.
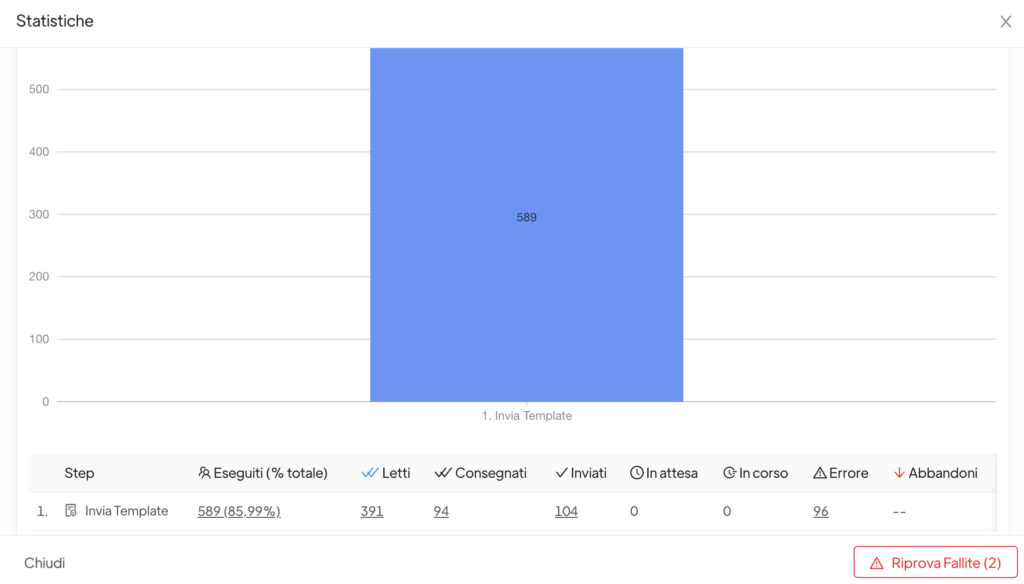
For messages: message level detail is highlighted (Sent, Received, and Read) then the number and percentage of messages are shown “Sent” are the messages sent to numbers that have a WhatsApp account but for which the customer either has their phone turned off or has not activated WhatsApp notifications; “Received” are the double-checked messages for which the customer has set on his account not to report whether the message was read or not; “Read” are the double-checked blue messages certainly read by the customers; “Failed” are the messages that were not delivered because, for example, the contact number is invalid (these conversations that are not initiated are not even paid for)
For Interactions: the number and percentage of customers who interacted with the automation are shown.
The bottom right “Retry Failed” button shows the contacts for which automation has failed, but for which the number is valid. This may include customers who have not installed WhatsApp on their number, or it may include all numbers for whom the campaign failed due to exceeding the daily sending limit.
Clicking on the button will automatically generate a campaign identical to the one you created, which has as its list only those contacts for whom the mailing failed. If you want to start automation for these contacts, you will then need to tell Spoki the day and time and schedule the campaign created via that button (you will find the new campaign in draft).
By scrolling down, additional reporting detail can be viewed:
Related articles #
Rules to avoid ban from WhatsApp


