In the Automations menu, it is possible to define the message to be sent to clients when a specific event (called a trigger or startup step) occurs.
To create automation, it is necessary to have available:
- Message template to be sent (already approved)(see how to create a template)
- Contact/integration list to send the message to
- Tag to apply(see how to create a tag)
Once these elements have been created and automation can be set up.
Go to Automations > New the following screen will open:
It is always very important to name automation to correctly identify all flows. Another suggestion at the name level, is to include numbers that identify the streams (e.g., first message to be sent containing two buttons: 1.1 first message; 1.1.1 response first button; 1.1.2 response second button).
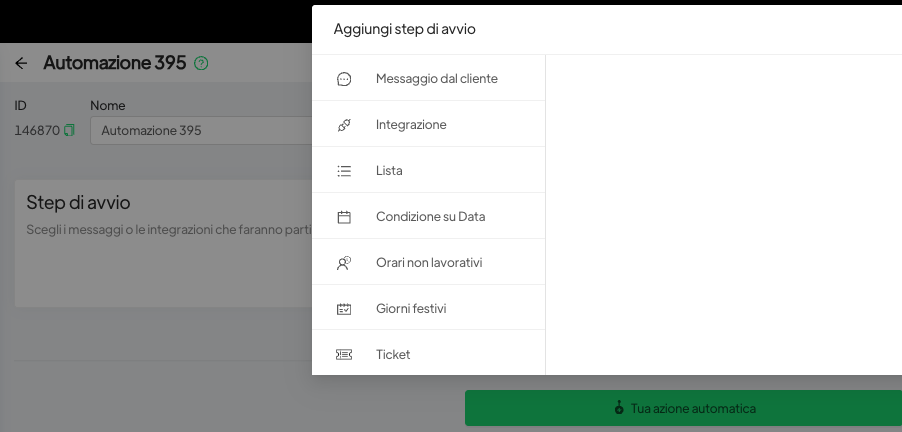
We must then indicate in “add start step” what will be the condition (trigger) that will trigger the event that we will indicate in “your automatic action.”
The possible triggers are as follows:
- Message from the customer
- Integration
- List
- Condition on Date (see further discussion)
- Non-business hours (see further discussion)
- Public holidays (see further discussion)
- Ticket (see more)
Automation from Message from customer: #
This automation starts the moment a client writes exactly the sentence entered in the automation. The two most common use cases are:
When a customer uses a chat button from the site, sending exactly the proposed phrase (see Chat Button)
When a customer clicks on a button previously submitted via a template with buttons of the type “Text Response” (see Template)
Warning. The same sentence can initiate one and only one automation.
Automation from Integrations: #
This automation has as triggers inputs that are derived from external instruments.
Please refer to the Integrations page in the platform and on the website for further details.
Automation from Lista: #
Warning. It is recommended that automations that have a list of contacts as a trigger be run through the Campaign function.
The “List” startup step function from automation is a feature that should be used only for test situations; instead, it is appropriate, if you want to start a template message to a list of contacts, to use the campaigns feature and then enter the specific list to which to start the message in the campaign.
This allows you to schedule the sending (without having to start automation manually) and has even more detailed statistics.
You can create automation without any startup steps and then insert the list directly into campaigns. In case you were to insert a list into the automation (e.g., a test list) and then run a campaign targeting that automation, the list inserted into the automation will be ignored.
The use of this feature can then be reduced to test situations and the ability to leverage this automation to assign tags/remove tags, delete contacts.
Read this article to understand how to tag a contact list.
Automation from Condition on Date: #
See how to start a reminder message automatically from Spoki
Automation for non-working days #
By activating this automation you will set up the sending of a message that will be received by all customers who write any message to your number during the hours that have not been designated as business hours. This automation will start only if the message received from the client is not matched by other automated response automations.
Holiday automation #
By activating this automation you will set up the sending of a template message that all customers who write any message to your number on those specific days will receive. This automation will start only if the message received from the client is not matched by other automated response automations.
Ticket #
By enabling this automation you will be able to trigger an automatic message whenever the status of tickets associated with the contact changes.
Check out the dedicated page: TICKET
Definition of automatic action #
Once the startup step is defined, we move on to define what the automation is to do.
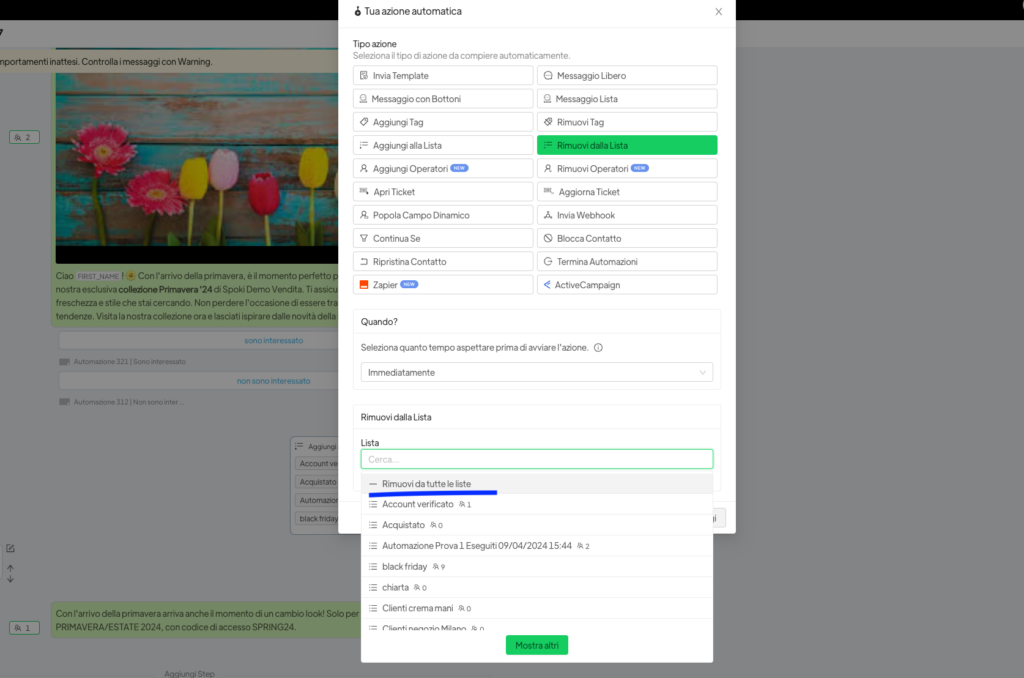
By clicking on the bottom-right button “Your automatic action,” a series of operations can be set up.
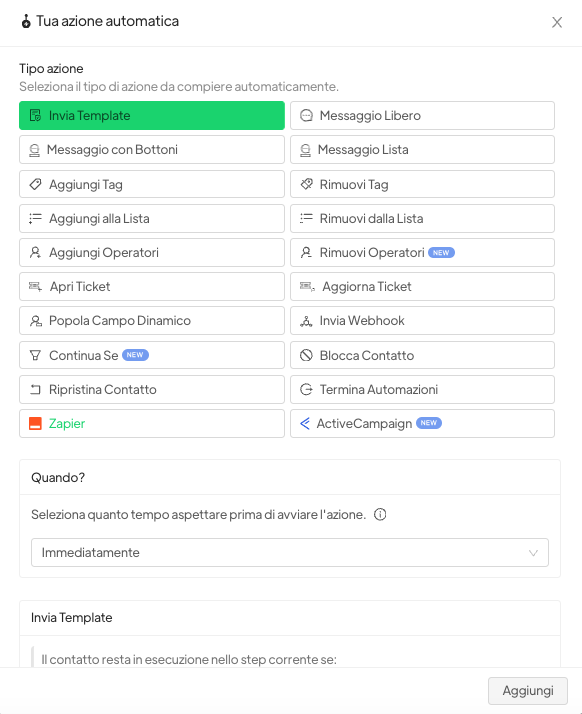
Send Template: choose the template previously requested and approved by WhatsApp. The template is necessary if you are the one who first contacts your customers.
Send Free Message: you can send a free message if the customer has interacted by sending a message in the previous 24h (an example is if the customer clicks on the button of one of your templates).
Send free message with Buttons: it is possible to send a free message by adding buttons (as is the case with templates). This type of message can be sent only and exclusively if the customer has interacted by sending a message in the previous 24h (an example is if the customer clicks on the button of one of your templates).
Send free message with List : you can send a free message with list (maximum 10 items in the list). This type of message can be sent only and exclusively if the customer has interacted by sending a message in the previous 24h (an example is if the customer clicks on the button of one of your templates). The free message with list is used to allow the client to choose an item from a list, an example might be “select province” with the list of provinces referring to different automations.
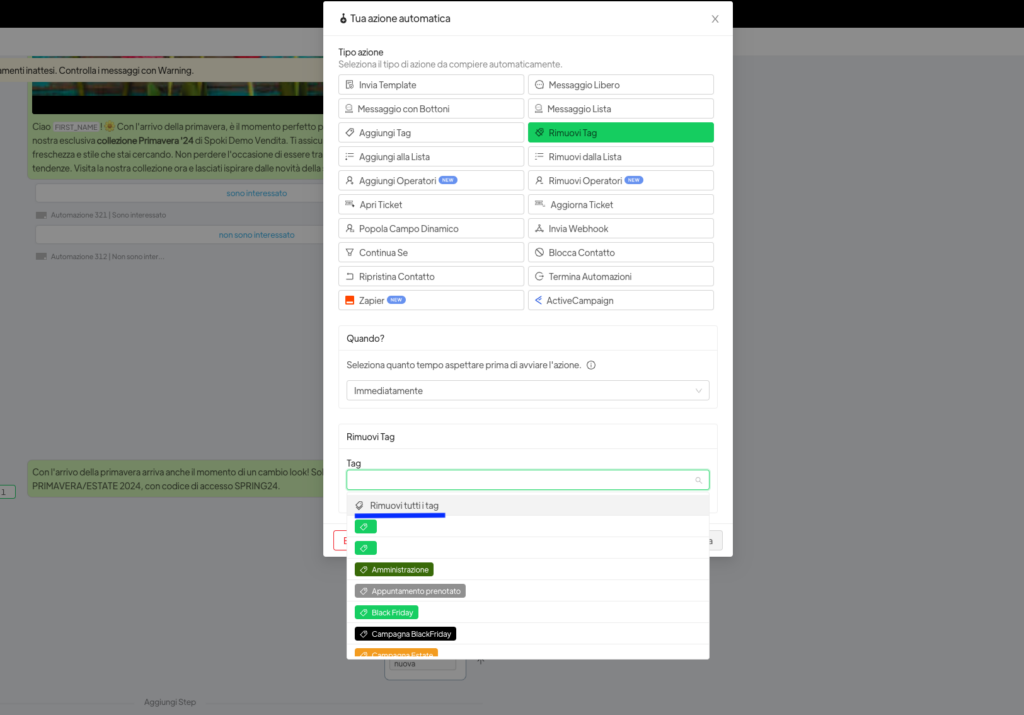
Add/Remove Contact Tag: assigns a tag automatically at the time the action defined in the trigger occurs, you can automatically remove all tags entered manually by clicking on Remove All Tags
Add/remove from List: allows you to add contacts to a specific list or remove them from the list. You can add multiple lists in the same step or in several automation steps and remove them with one click
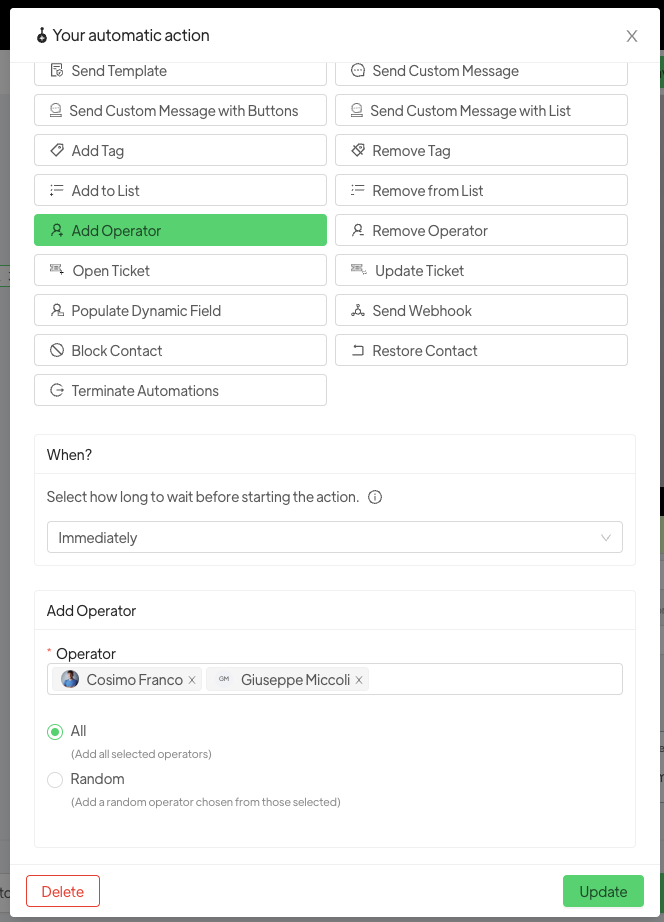
Add/remove operator: allows a contact to be assigned to a specific operator. In the case where the operator has a “chat operator” role, that operator will only see the contacts assigned to him or her. Learn more about How to create new users and assign different powers.
Also there is the possibility to add multiple operators by selecting all of them or randomly assigning the contact.
Open Ticket/Close Ticket: allows you to automatically open/close the Ticket status.
Populate Dynamic Field: has a dual functionality.
select custom value to set the populating of a dynamic field the same for all messages sent in that automation (e.g., dynamic field “operator” if the operator name must be “Emanuela” for that submission) This way you can avoid requiring multiple templates if the text varies by one word.
select last message received in chat if you intend to save to a specific dynamic field the first message received from a client following the sending of your message. Warning. The success of this feature depends a great deal on the client executing exactly what is requested of him. Spoki will ONLY store the first message received!
Send Webhook: allows a webhook to be sent to an external management system.
Block Contact : allows you to automatically block contacts entering a specific automation.
Restore Contact : allows previously locked contacts entering a specific automation to be restored.
Terminate Automations : allows you to terminate all other automations in which the contact is entered.
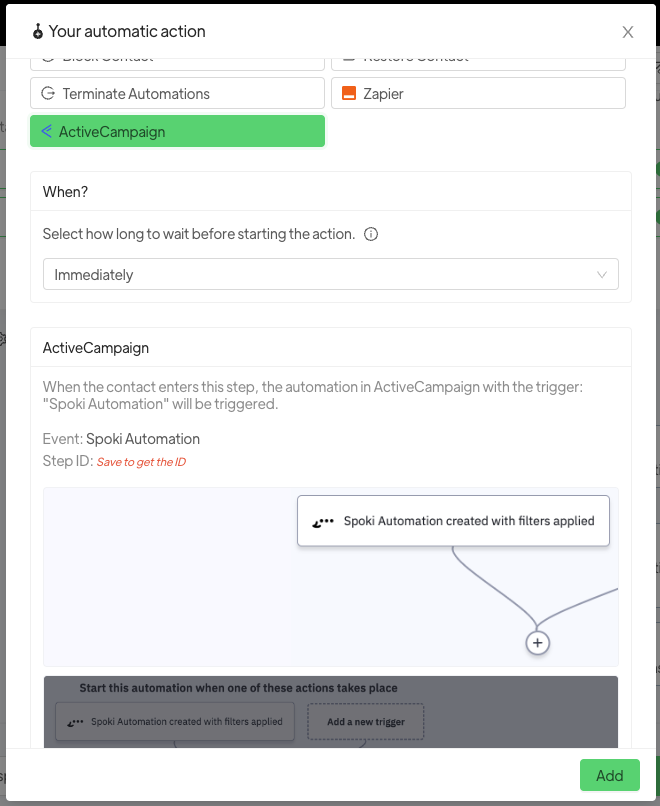
Active Campaign: allows you to start an ActiveCampaign automation through a Spoki automation.
It is necessary for each of these actions to indicate the“When?“, indicating after how long to start that specific action. WARNING! The time that is indicated, is counted from the previous step.
Read the in-depth discussion of the logic underlying multiple step changes present in an automation already started with contacts in progress. CLICK HERE.
Related articles #
Rules to avoid ban from WhatsApp


